When you run the Windows 2000 Server Setup program, you have to provide information about how to install and configure the operating system. Thorough planning will make your installation of W2K more efficient. An understanding of the configuration options will also help to ensure that you have properly configured your system.
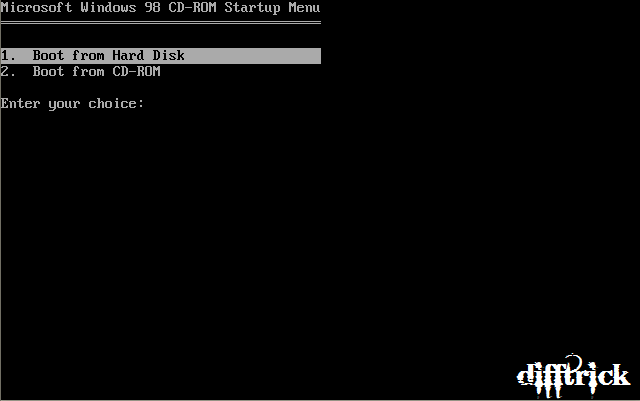
Step 1: Insert the Windows server 2000 CD in CD/ROM. And Restart the Computer.
Then this Message is appear.

Step 2: Press Enter key the continue process.
Step 3: Setup is loading the some FAT files.

Step 4: Welcome to Setup is appear in screen. Press Enter the to install the Windows server 2000.

Step 5: Press F8 to I agree for Read License and Agreement.

Step 6: Select or create the partition on which you will install.

Step 7: create and size the partition on which you will install Windows 2000.

Step 8: If you want to create a partition that will span the entire hard disk's size - press Enter.

Step 9: If the hard disk is already partitioned, but has enough unpartitioned disk space, you can create an additional partition in the unpartitioned space.

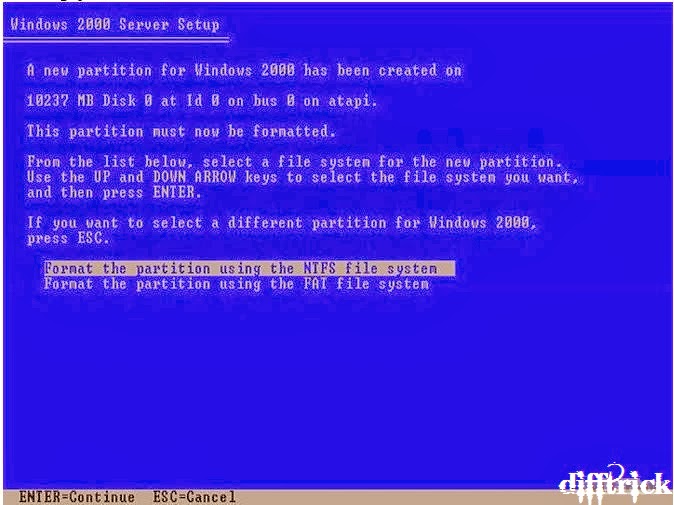
Step 10: Select a file system for the installation partition. After you create the partition on which you will install W2K, you can use Setup to select the file system with which to format the partition. W2K supports the NTFS file system in addition to the file allocation table (FAT) and FAT32 file systems. Windows Server 2003, Windows XP Professional, Windows 2000, and Windows NT are the only Microsoft operating systems that you can use to gain access to data on a local hard disk that is formatted with NTFS. If you plan to gain access to files that are on a local W2K partition with the Microsoft Windows 95 or Windows 98 operating systems, you should format the partition with a FAT or FAT32 file system. We will use NTFS.
Step 11: Setup will then begin copying necessary files from the installation point (CD, local I386 or network share).

Step 12: Note: If you began the installation process from an MS-DOS floppy, make sure you have and run SMARTDRV from the floppy, otherwise the copying process will probably last more than an hour, perhaps even more. With SMARTDRV (or if setup was run by booting from CD) the copying will probably last a few minutes, no more than 5 max.

Step 13: The computer will restart in graphical mode, and the installation will continue.

Step 14: The setup process reboots and loads a GUI mode phase.

Step 15: It will then begin to load device drivers based upon what it finds on your computer. You don't need to do anything at this stage.

Step 16: If your computer stops responding during this phase (the progress bar is stuck almost half-way, and there is no disk activity) - shut down your computer and begin removing hardware such as PCI and ISA cards. If it works for you then later try to figure out how to make that specific piece of hardware work (it's probably not in the HCL).

Step 17: Click Customize to change regional settings, if necessary.

Step 18: Current System Locale - Affects how programs display dates, times, currency, and numbers. Choose the locale that matches your location, for example, French (Canada).

Step 19: Current Keyboard Layout - Accommodates the special characters and symbols used in different languages. Your keyboard layout determines which characters appear when you press keys on the keyboard.

Step 20: If you don't need to make any changes just press Next.

Step 21: If you do need to make changes press Customize and add your System Locale etc.

Step 22: Note for Hebrew users: In W2K it is NOT SAFE to install Hebrew language support at this phase! If you don't listen to me, good chances are that you'll get fonts in some Office applications such as Outlook and others.

Step 23: Type Name and Organization name.

Step 24: Type product keys.

Step 25: Enter the appropriate license type and number of purchased licenses.

Step 26: Type the computer name and a password for the local Administrator account. The local Administrator account resides in the SAM of the computer, not in Active Directory. If you will be installing in a domain, you need either a pre-assigned computer name for which a domain account has been created, or the right to create a computer account within the domain.

Step 27: Choose which components to install or remove from the system.

Step 28: Select date and Time.

Step 29: Setup will now install the networking components.

Step 30: Press Next to accept the Typical settings option if you have one of the following situations:
- You have a functional DHCP on your network.
- You have a computer running Internet Connection Sharing (ICS).
- You're in a workgroup environment and do not plan to have any other servers or Active Directory at all, and all other workgroup members are configured in the same manner.
- Otherwise select Custom Settings and press Next to customize your network settings.

Step 31: Highlight the TCP/IP selection and press Properties.

 Step 32: In the General tab enter the required information. You must specify the IP address of the computer, and if you don't know what the Subnet Mask entry should be - you can simply place your mouse pointer over the empty area in the Subnet Mask box and click it. The OS will automatically select the value it thinks is good for the IP address you provided.
Step 33: To successfully join a domain you need the following:
- The person performing the installation must have a user account in Active Directory. This account does not need to be the domain Administrator account.
- The computer must have an existing computer account in the Active Directory database of the domain that the computer is joining, and the computer must be named exactly as its domain account is named.
- The person performing the installation must have appropriate permission to create a domain account for the computer during installation.

Step 34: Also, you need to have connectivity to the domain's domain controllers (only to the PDC if on an NT 4.0 domain) and a fully functional DNS server (only in AD domains). Read the Joining a Domain in Windows XP Pro and Requirements when Joining a Domain pages for more on this issue.

Step 35: Enter the Active Directory domain name (in the form of xxx.yyy, for example: DPETRI.NET) or the NetBIOS name of the NT 4.0 domain (in the form of xxx, for example: DPETRI). Press Next.

Step 36: A username/password window will appear. Enter the name and password of the domain's administrator (or your own if you're the administrator on the target domain).

Step 37: Next the setup process will finish copying files and configuring the setup. You do not need to do anything.

Step 38: After the copying and configuring phase is finished, if Windows Server 2003 finds that you have a badly configured screen resolution it will advise you to change it and ask you if you see the new settings right.

Step 39: Setup finishes and displays the finish window. Unfortunately, you must press Finish in order to reboot.

Step 40: CTRL-ALT-DEL window.

Step 40: That's it! you're done!

Finally, after complete installation, its looks like these.